Our In-Depth Hiblow HP 80 Rebuild Guide!
Check Out The Video Here
The alarm of your septic control unit is buzzing, and the warning light is flashing.
Your Hiblow HP 80 septic aerator has suddenly stopped working.
Before you purchase a replacement, you should consider rebuilding your existing Hiblow aerator using a repair kit.
Hiblow septic air pumps typically stop working when one of the diaphragms tear.
The air pump is designed with a safety screw that breaks when the magnet travels too far due to the diaphragm rupturing to prevent further damage to the aerator.
Our Hiblow HP 80 Rebuild Tutorial
This tutorial will provide a step-by-step process of rebuilding a Hiblow aerator using a rebuild kit.
In this demonstration, we will be using the Hiblow HP-60/80 rebuild kit. However, the process is the same for any model of Hiblow aerator.
This process is also the same for other linear diaphragm pumps due to them having similar design layouts and working methods.
Step 1: Gather Tools And Materials
You will need these items below to rebuild your Hiblow HP 80 aerator.
A chart is provided below to match up your Hiblow model number with the proper repair kit available at Wholesale Septic Supply.
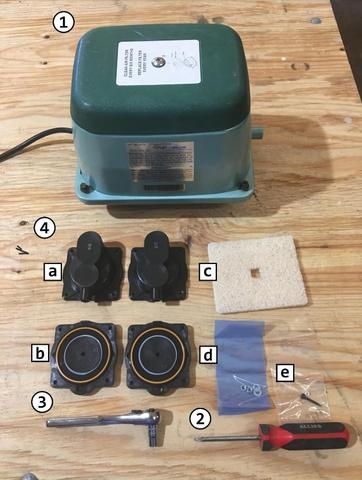
What you will need:
A Phillips screwdriver
5/16 or 8mm socket wrench
7mm for the diaphragm nut/washer
A repair kit for your aerator
Your repair kit should have the following replacement parts:
2 replacement chamber blocks
2 replacement diaphragms
1 replacement Dust filter
New replacement Nuts and washers for the diaphragm
1 Replacement safety screw
Below is a chart to help you find a repair kit for your aerator:
| Hiblow Model | Rebuild/Repair Kit |
| HP-30 | HP-30 Rebuild/Repair Kit |
| HP-40 | HP-40 Rebuild/Repair Kit |
| HP-60 | HP-60 Rebuild/Repair Kit |
| HP-80 | HP-80 Rebuild/Repair Kit |
| HP-100 | HP-100 Rebuild/Repair Kit |
| HP-100LL | HP-100LL Rebuild/Repair Kit |
| HP-120 | HP-120 Rebuild/Repair Kit |
| HP-120LL | HP-120LL Rebuild/Repair Kit |
| HP-150 | HP-150 Rebuild/Repair Kit |
| HP-200 | HP-200 Rebuild/Repair Kit |
Step 2: Remove Septic Aerator Corner Bolts
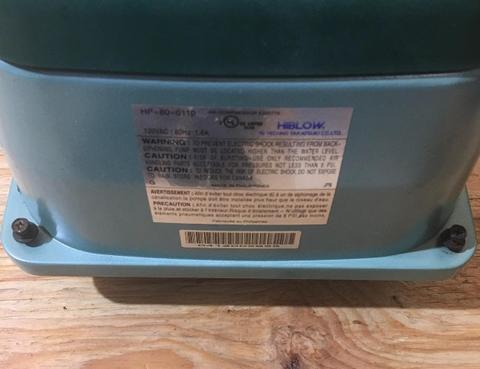
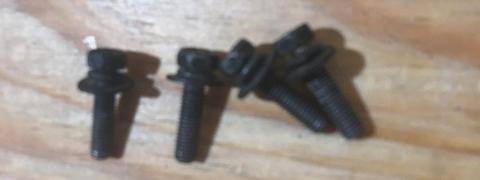
Locate and remove the four bolts on each corner of your septic tank aerator using the 8mm wrench or the Phillips screwdriver.
This will usually be easier using a wrench because the insides of the screws may be rusted or have dirt in them and using the screwdriver may run the risk of stripping the old screw.
Don’t panic if this happens; you can always use a socket wrench to remove the bolts.
Step 3: Remove Septic Aerator Top Cover
Remove the green cover form the base of the aerator.
This reveals the insides of the aerator.
You might have to tap lightly on the edges with a hammer or mallet to loosen the cover.
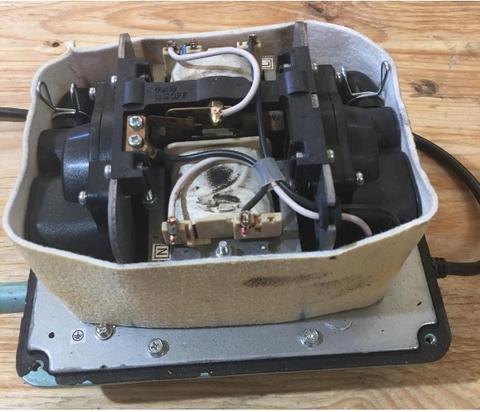
Step 4: Remove Fire-Resistant Sound-Insulating Shroud
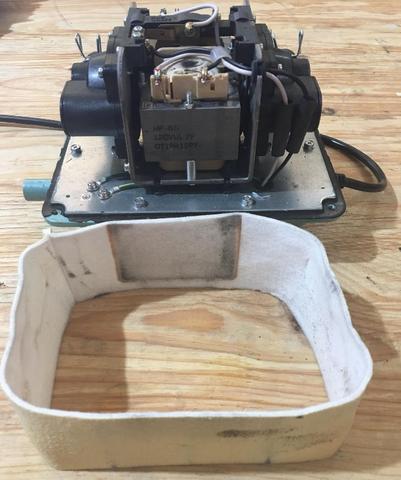
Remove the rectangular sound insulating shroud that is wrapped around the unit.
This will be tightly fit around the aerator.
Step 5: Remove Chamber Block Screws
Locate the two chamber blocks on the ends of the aerator.
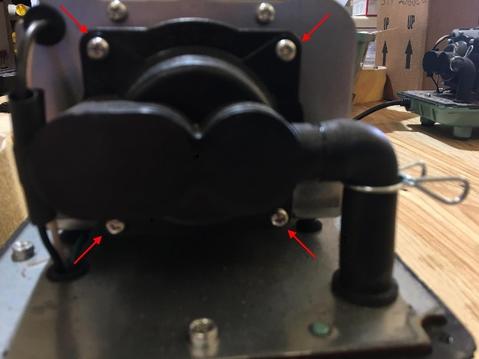
Use the Philips screwdriver to remove 8 total screws from both chamber blocks.
Step 6: Remove Old Chamber Blocks
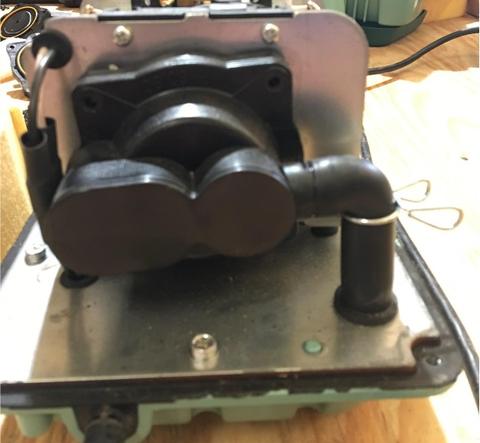
Once the screws are removed, remove the chamber blocks to expose the diaphragms.
To do this, you will need to detach them from the rubber air tubes.
Be sure to detach the chamber blocks from the tubes after the blocks are unscrewed.
Twist the chamber blocks back and forth to accomplish this, do not pry at the rubber air tubes, as you run the risk of tearing the rubber.
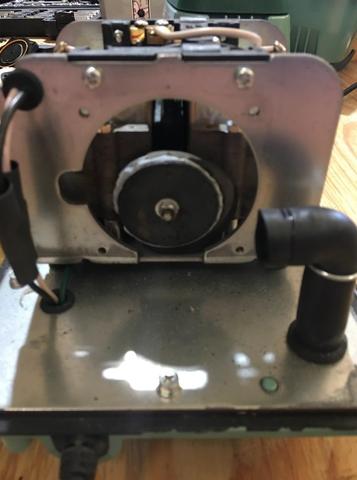
Step 7: Remove Nuts And Washers
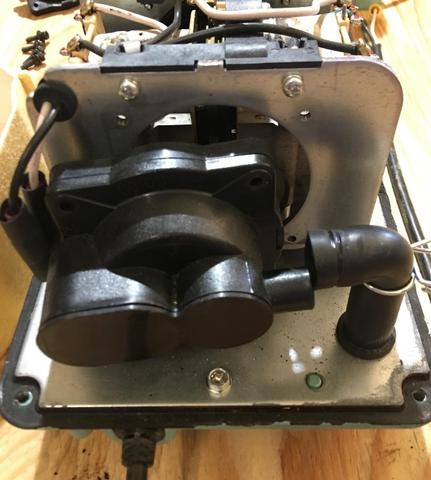
Use the 7mm wrench to remove a nut and washer located in the center of each diaphragm.
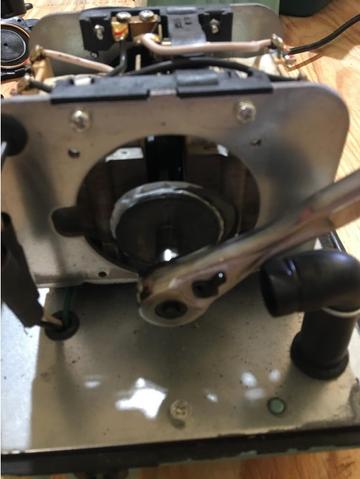
Here is the second diaphragm below.
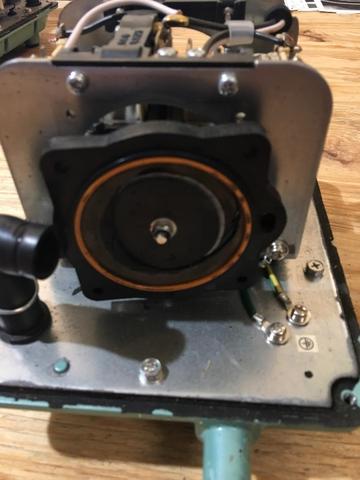
Step 8: Remove Old Diaphragms
Remove the old diaphragms.
You will have to remove both diaphragms before inspecting the magnet in the next step.
Step 9: Check Magnetic Rod Block
Remove and inspect the magnet in between where the two diaphragms were.
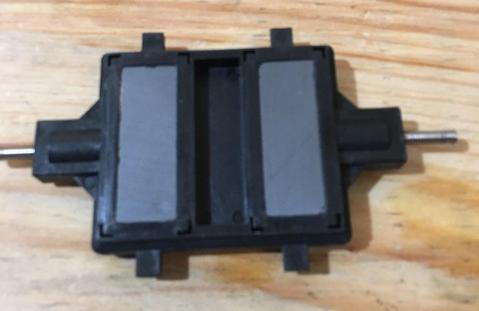
You should be looking for any cracks in the housing, or if the threads that were attached to the diaphragms are broken. These issues may happen if the safety screw does not function properly.
If your magnet is damaged, you should purchase a replacement magnet before continuing the rebuild.
If you don’t spot any issues, replace the old magnet back into the aerator.
If your aerator has a lot of red dust inside, It is advisable to replace aerator due to the fact the coils are breaking, which is a sign your aerator doesn’t have much more life left.
Step 10: Replace Old Diaphragms
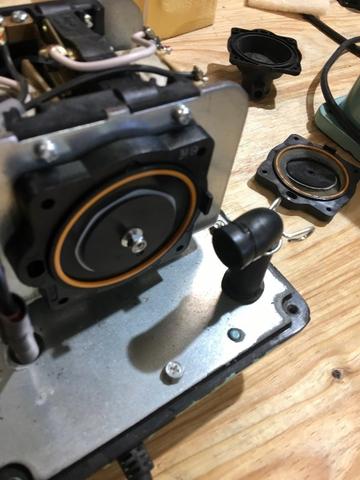
Put the new diaphragms on where the old ones used to be. Replace both diaphragms before replacing the chamber blocks.
Secure the new diaphragms using the replacement nuts and washers from the kit.
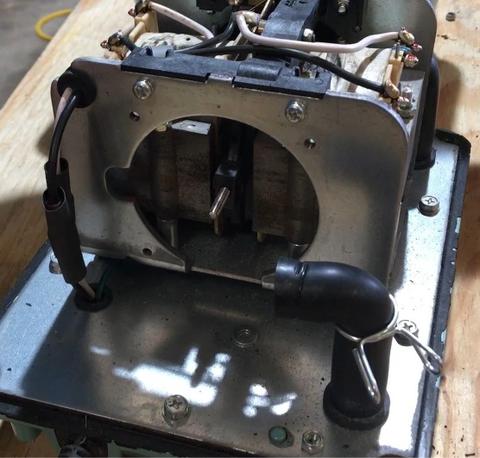
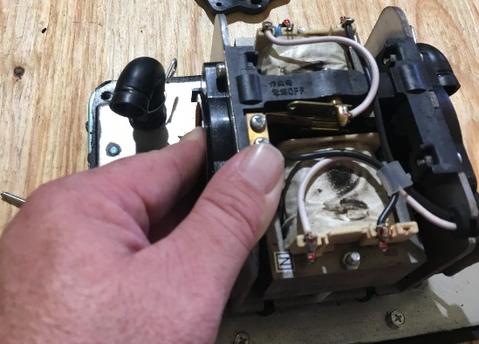
You will have to push into one of the diaphragms after replacing the first one so that the threads on the magnet stick out to replace the second diaphragm, as pictured below.
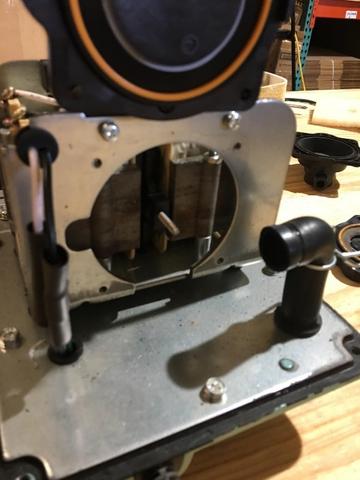
Pushing on one side of the diaphragm.
Step 11: Replace Old Chamber Blocks
Place the replacement chamber blocks onto the diaphragms.
Screw in the chamber blocks using the 8 screws that were removed in step 5. Be sure to secure the air tubes to the chamber blocks using the metal sealing clamps. The sealing clamps should be pointed upwards so that the shroud will fit back on correctly.
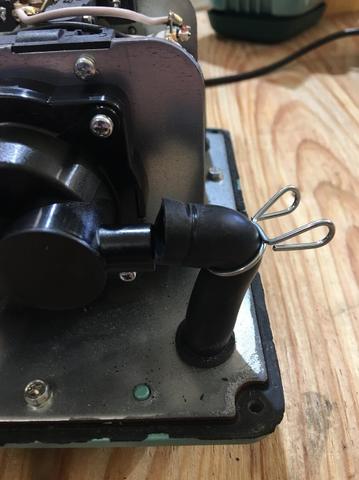
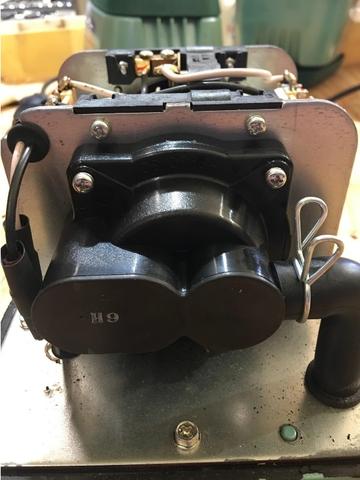
Step 12: Replace Old Safety Screw
Locate the broken safety screw on top of the septic aerator.
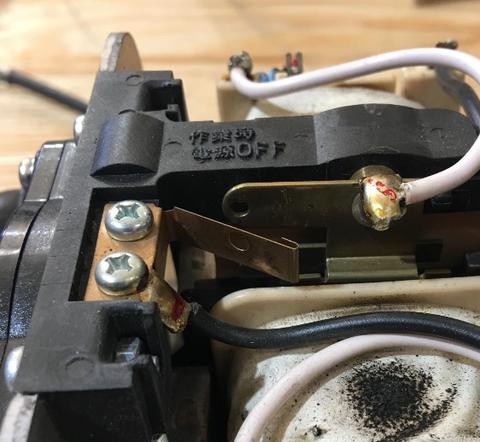
Insert the replacement safety screw through the two copper connectors. Make sure that the screw head is inserted on the other side of the copper connecters so that the white nylon nut can be threaded on correctly.
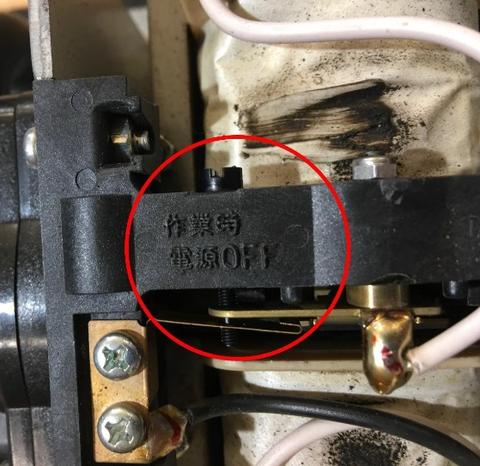
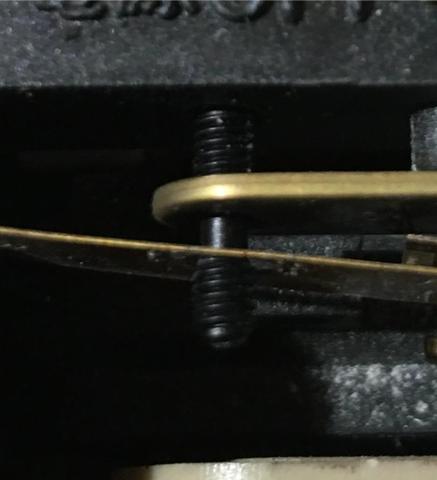
Once the safety screw is in place, take the white nylon nut on the end of the screw and tighten until the copper connectors are closed.
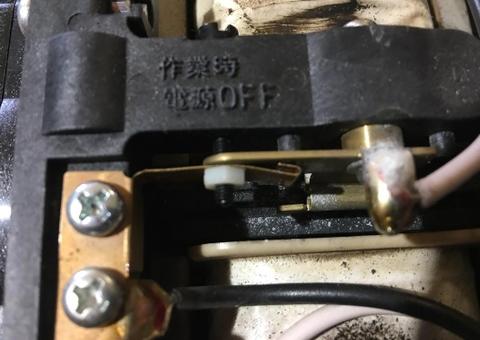
There is a space between the threads of the screw where it is smooth. The nylon nut only needs to be placed up to here.
Step 13: Replace Pump Shroud
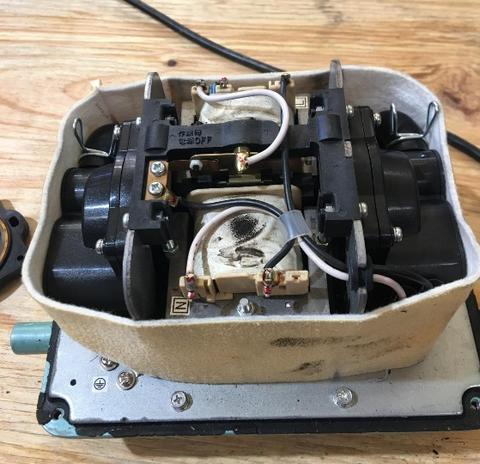
Replace the rectangular pump shroud that was removed in step 4.
Remember that the sealing pins on the air tubes need to be facing up for you to adequately replace the shroud.
Step 14: Replace Cover
Replace the aerator cover and corner bolts.
Step 15: Replace Air Filter
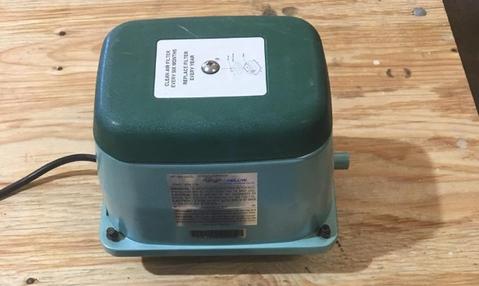
Use the Phillips head screwdriver to remove the top of the cover from your septic aerator.
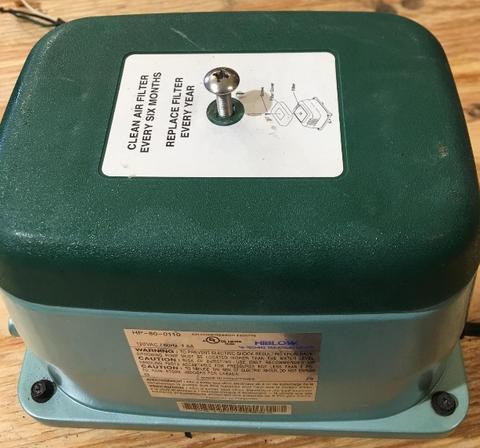
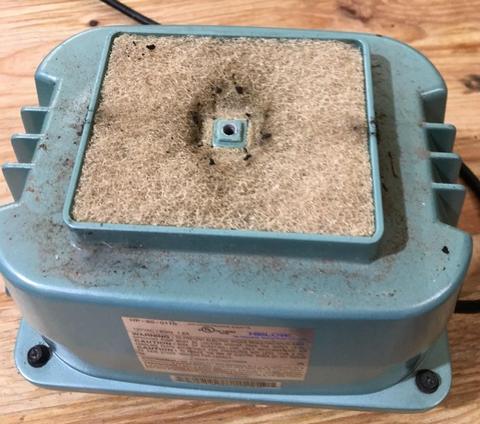
Replace the old filter with the new replacement from the kit.
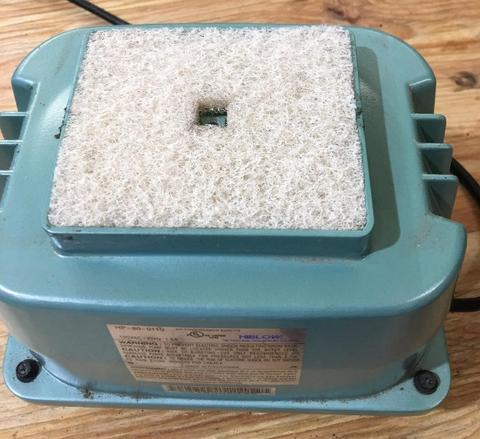
Screw the top of your septic aerator back on.
You're all finished!
You have successfully rebuilt your Hiblow Aerator.
Our In-Depth Hiblow HP 80 Rebuild Guide!
Check Out The Video Here
The alarm of your septic control unit is buzzing, and the warning light is flashing.
Your Hiblow HP 80 septic aerator has suddenly stopped working.
Before you purchase a replacement, you should consider rebuilding your existing Hiblow aerator using a repair kit.
Hiblow septic air pumps typically stop working when one of the diaphragms tear.
The air pump is designed with a safety screw that breaks when the magnet travels too far due to the diaphragm rupturing to prevent further damage to the aerator.
Our Hiblow HP 80 Rebuild Tutorial
This tutorial will provide a step-by-step process of rebuilding a Hiblow aerator using a rebuild kit.
In this demonstration, we will be using the Hiblow HP-60/80 rebuild kit. However, the process is the same for any model of Hiblow aerator.
This process is also the same for other linear diaphragm pumps due to them having similar design layouts and working methods.
Step 1: Gather Tools And Materials
You will need these items below to rebuild your Hiblow HP 80 aerator.
A chart is provided below to match up your Hiblow model number with the proper repair kit available at Wholesale Septic Supply.

What you will need:
A Phillips screwdriver
5/16 or 8mm socket wrench
7mm for the diaphragm nut/washer
A repair kit for your aerator
Your repair kit should have the following replacement parts:
2 replacement chamber blocks
2 replacement diaphragms
1 replacement Dust filter
New replacement Nuts and washers for the diaphragm
1 Replacement safety screw
Below is a chart to help you find a repair kit for your aerator:
| Hiblow Model | Rebuild/Repair Kit |
| HP-30 | HP-30 Rebuild/Repair Kit |
| HP-40 | HP-40 Rebuild/Repair Kit |
| HP-60 | HP-60 Rebuild/Repair Kit |
| HP-80 | HP-80 Rebuild/Repair Kit |
| HP-100 | HP-100 Rebuild/Repair Kit |
| HP-100LL | HP-100LL Rebuild/Repair Kit |
| HP-120 | HP-120 Rebuild/Repair Kit |
| HP-120LL | HP-120LL Rebuild/Repair Kit |
| HP-150 | HP-150 Rebuild/Repair Kit |
| HP-200 | HP-200 Rebuild/Repair Kit |
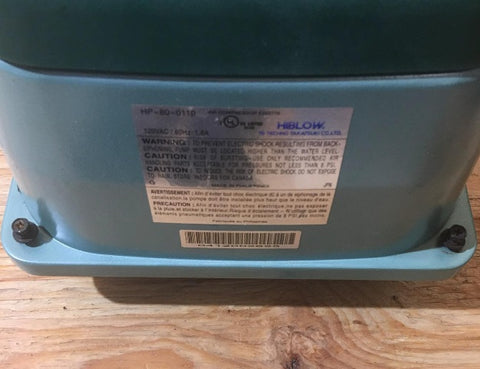
Step 2: Remove Septic Aerator Corner Bolts
Locate and remove the four bolts on each corner of your septic tank aerator using the 8mm wrench or the Philips screwdriver.
This will usually be easier using a wrench because the insides of the screws may be rusted or have dirt in them and using the screwdriver may run the risk of stripping the old screw.
Don’t panic if this happens; you can always use a socket wrench to remove the bolts.

Step 3: Remove Septic Aerator Top Cover
Remove the green cover form the base of the aerator.
This reveals the insides of the aerator.
You might have to tap lightly on the edges with a hammer or mallet to loosen the cover.

Step 4: Remove Fire-Resistant Sound-Insulating Shroud
Remove the rectangular sound insulating shroud that is wrapped around the unit.
This will be tightly fit around the aerator.

Step 5: Remove Chamber Block Screws
Locate the two chamber blocks on the ends of the aerator.
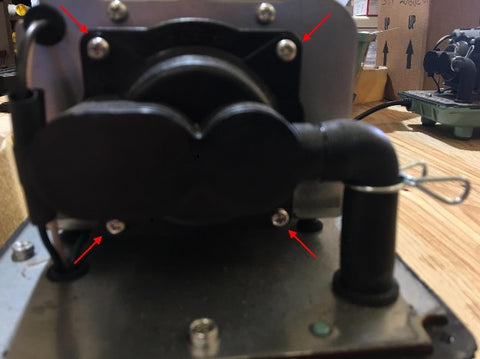
Use the Philips screwdriver to remove 8 total screws from both chamber blocks.

Step 6: Remove Old Chamber Blocks
Once the screws are removed, remove the chamber blocks to expose the diaphragms.
To do this, you will need to detach them from the rubber air tubes.
Be sure to detach the chamber blocks from the tubes after the blocks are unscrewed.
Twist the chamber blocks back and forth to accomplish this, do not pry at the rubber air tubes, as you run the risk of tearing the rubber.


Step 8: Remove Nuts And Washers
Use the 7mm wrench to remove a nut and washer located in the center of each diaphragm.

Here is the second diaphragm below.

Step 9: Remove Old Diaphragms
Remove the old diaphragms.
You will have to remove both diaphragms before inspecting the magnet in the next step.

Step 10: Check Magnetic Rod Block
Remove and inspect the magnet in between where the two diaphragms were.

You should be looking for any cracks in the housing, or if the threads that were attached to the diaphragms are broken. These issues may happen if the safety screw does not function properly.
If your magnet is damaged, you should purchase a replacement magnet before continuing the rebuild.
If you don’t spot any issues, replace the old magnet back into the aerator.
If your aerator has a lot of red dust inside, It is advisable to replace aerator due to the fact the coils are breaking, which is a sign your aerator doesn’t have much more life left.
Step 10: Replace Old Diaphragms
Put the new diaphragms on where the old ones used to be. Replace both diaphragms before replacing the chamber blocks.
Secure the new diaphragms using the replacement nuts and washers from the kit.
You will have to push into one of the diaphragms after replacing the first one so that the threads on the magnet stick out to replace the second diaphragm, as pictured below.

Pushing on one side of the diaphragm.


Step 11: Replace Old Chamber Blocks
Place the replacement chamber blocks onto the diaphragms.
Screw in the chamber blocks using the 8 screws that were removed in step 5.
Be sure to secure the air tubes to the chamber blocks using the metal sealing clamps. The sealing clamps should be pointed upwards so that the shroud will fit back on correctly.


Step 12: Replace Old Safety Screw
Locate the broken safety screw on top of the septic aerator.

Insert the replacement safety screw through the two copper connectors. Make sure that the screw head is inserted on the other side of the copper connecters so that the white nylon nut can be threaded on correctly.

Once the safety screw is in place, take the white nylon nut on the end of the screw and tighten until the copper connectors are closed.

There is a space between the threads of the screw where it is smooth. The nylon nut only needs to be placed up to here.

Step 13: Replace Pump Shroud
Replace the rectangular pump shroud that was removed in step 4.
Remember that the sealing pins on the air tubes need to be facing up for you to adequately replace the shroud.

Step 14: Replace Cover
Replace the aerator cover and corner bolts.

Step 15: Replace Air Filter
Use the Phillips head screwdriver to remove the top of the cover from your septic aerator.

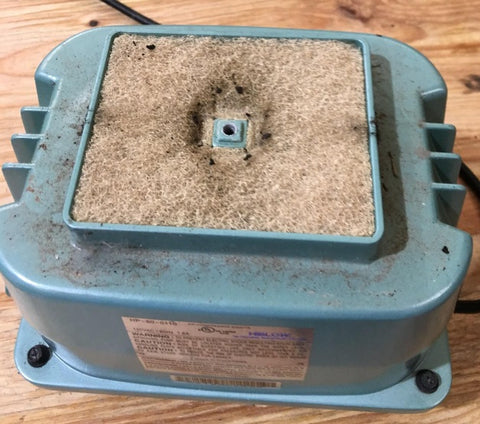
Replace the old filter with the new replacement from the kit.

Screw the top of your septic aerator back on.
You’re now finished!
You have successfully rebuilt your Hiblow Aerator.
If you would like more information about Hiblow Septic Air Pump rebuild kits, please visit here where we post tips, tricks, and other great information!


Does the chamber block ever go bad?
Yes it does the rubber check valves go bad and the chamber blocks need to be replaced. It’s always advised to buy a full hiblow rebuild kit.
How often do I need to repair my Hiblow HP 80?
We recommend replacing the internal components of your septic aerator once every 2 years. This ensures that you wont need to buy an entire new pump, and will help keep operational costs to a minimum over the lifetime of your septic system.
We’ve rebuilt our Hiblow twice already. How many more times can we rebuild it??
You have probably rebuilt it for the last time depending on how old the hiblow is. If approaching the 9-11 year mark it’s probably best to replace it next time. Red dust inside the unit is a sign the coils are getting weak and the unit needs to be replaced. It’s the gust is caused by the magnet getting to close to the coils cause iron oxide to form. If it’s been a shorter period you might have underlying issues like a diffuser needs to be replaced. To purchase a new one, this is the cheapest online seller we have… Read more »
We opened up our septic air pump and there is red dust on the inside all over the pump. We saw video that said this was sign it can’t be rebuilt.
If red dust is inside the unit then it means the coils are going out. The pumps run non stop for years and after awhile the components start to age. As the coils get weak they cant product enough charge to push the magnet properly, also by being weakened it cant keep the magnet at a proper distance from the coil itself. when this happens iron oxide is formed from the reaction of the electrical charge and the iron in the magnet this is what creates the red dust. We will not rebuild units like this they tend to fail… Read more »
Can I reuse the the chamber blocks and just replace the diaphragms. I see that just diagrams are sold is their a draw back to this and will the rebuild last just as long by doing this.
You can but it's advised you use the full rebuild kit. The little check valves on the chamber blocks go bad and that's why you should just a full Hiblow rebuild kit.
My diaphragms are good and the safety screw is intact but I still have a red light and alarm buzzing. Not to mention it smells rather strong when the sprinklers come on. The aerator is pumping air. What would I check next?
The air switch to the alarm could be bad that’s a 20 dollar part. It could be that something is wrong with the effluent pump as well. If you have two lights on the system one amber and one red the amber is for the aerator and the red is for the pump in 99 percent of cases. . The airline to the tank or in the tank could be separated as well if you open the aeration tank and can’t hear air bubbles then the line is broke or separated somewhere and needs to be fixed and the smell… Read more »
I need also a replacement of the rubber gammet that is underneath the cavity of the coils, where the two little pumps push air into the manifold, I took this apart and it fell apart it was dry rotted. But I don't see this in the repair kit. How do I get this also?