Why is the Alarm Going off on my Hiblow Septic Aerator?
The alarm of your septic control unit is buzzing, and the warning light is flashing. Your Hiblow aerator has suddenly stopped working.
Before you purchase a replacement, you should consider rebuilding your existing Hiblow aerator using a repair kit.
Hiblow septic air pumps typically stop working when one of the diaphragms tear.
The air pump is designed with a safety screw that breaks when the magnet travels too far due to the diaphragm rupturing to prevent further damage to the aerator.
This Tutorial
This tutorial will provide a step-by-step process of rebuilding a Hiblow aerator using a rebuild kit.
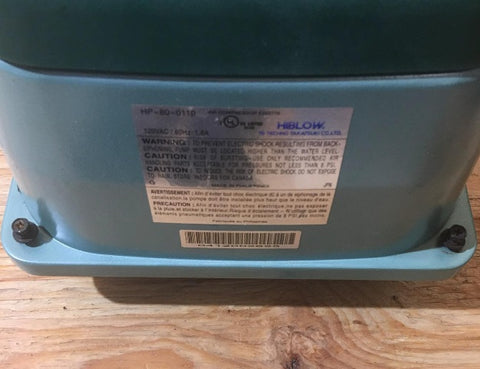
In this demonstration, we will be using the Hiblow HP-60/80 rebuild kit. However, the process is the same for any model of Hiblow aerator.
This process is also the same for other linear diaphragm pumps due to them having similar design layouts and working methods.
Step 1: Gather Tools and Materials
You will need these items below to rebuild your aerator.
A chart is provided below to match up your Hiblow model number with the proper repair kit in our store.

What you will need:
- The damaged aerator
- Phillips screwdriver
- 5/16 or 8mm socket wrench
7mm for the diaphragm nut/washer - A repair kit for your aerator
Your repair kit should have the following replacement parts:
- 2 blocks
- 2 diaphragms
- Dust filter
- Nuts and washers for the diaphragm
- Replacement safety screw
Below is a chart to help you find a repair kit for your aerator:
| Hiblow Model | Rebuild/Repair Kit |
| HP-30 | HP-30 Rebuild/Repair Kit |
| HP-40 | HP-40 Rebuild/Repair Kit |
| HP-60 | HP-60 Rebuild/Repair Kit |
| HP-80 | HP-80 Rebuild/Repair Kit |
| HP-100 | HP-100 Rebuild/Repair Kit |
| HP-100LL | HP-100LL Rebuild/Repair Kit |
| HP-120 | HP-120 Rebuild/Repair Kit |
| HP-120LL | HP-120LL Rebuild/Repair Kit |
| HP-150 | HP-150 Rebuild/Repair Kit |
| HP-200 | HP-200 Rebuild/Repair Kit |
Step 2: Remove corner bolts
Locate and remove the four bolts on each corner of the aerator using the 8mm wrench or the Philips screwdriver.
This will usually be easier using the wrench because the insides of the screws may be rusted or have dirt in them.
Using the screwdriver may run the risk of stripping the screw.
Don’t panic if this happens; you can still use a socket wrench to remove the bolts.


Step 3: Remove the top cover
Remove the green cover form the base of the aerator.
This reveals the insides of the aerator.
You might have to tap lightly on the edges with a hammer or mallet to loosen the cover.

Step 4: Remove the Fire-Resistant sound-insulating Shroud
Remove the rectangular sound-insulating shroud that is wrapped around the unit.
This will be tightly fit around the aerator.

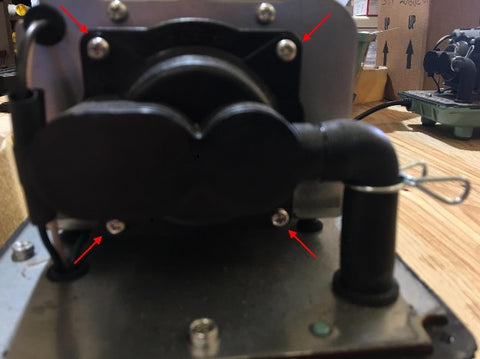
Step 5: Remove chamber block screws
Locate the two-chamber blocks on the ends of the aerator.

Use the Philips screwdriver to remove 8 total screws from both chamber blocks.

Step 6: Remove Chamber Blocks
Once the screws are removed, remove the chamber blocks to expose the diaphragms.
To do this, you will need to detach them from the rubber air tubes.
Be sure to detach the chamber blocks from the tubes after the blocks are unscrewed.
Twist the chamber blocks back and forth to accomplish this, do not pry at the rubber air tubes, as you run the risk of tearing the rubber.


Step 7: Remove Nuts and Washers
Use the 7mm wrench to remove a nut and washer located in the center of each diaphragm.

Here is the second diaphragm below.

Step 8: Remove Diaphragms
Remove the old diaphragms.
You will have to remove both diaphragms before inspecting the magnet in the next step.

Step 9: Check Magnetic Rod Block
Remove and inspect the magnet in between where the two diaphragms were.

You should be looking for any cracks in the housing, or if the threads that were attached to the diaphragms are broken. These issues may happen if the safety screw does not function properly.
If your magnet is damaged, you should purchase a replacement magnet before continuing the rebuild.
If you don’t spot any issues, replace the old magnet back into the aerator.
If your aerator has a lot of red dust inside, It is advisable to replace aerator due to the fact the coils are breaking, which is a sign your aerator doesn’t have much more life left.
Step 10: Replace Diaphragms
Put the new diaphragms on where the old ones used to be. Replace both diaphragms before replacing the chamber blocks.
Secure the new diaphragms using the replacement nuts and washers from the kit.
You will have to push into one of the diaphragms after replacing the first one so that the threads on the magnet stick out to replace the second diaphragm, as pictured below.

Pushing on one side of the diaphragm.


Step 11: Replace Chamber Blocks
Place the replacement chamber blocks onto the diaphragms.
Screw-in the chamber blocks using the 8 screws that were removed in step 5.
Be sure to secure the air tubes to the chamber blocks using the metal sealing clamps. The sealing clamps should be pointed upwards so that the shroud will fit back on correctly.


Step 12: Replace Safety Screw
Locate the broken safety screw on top of the aerator

Insert the replacement safety screw through the two copper connectors. Make sure that the screw head is inserted on the other side of the copper connectors so that the white nylon nut can be threaded on correctly.

Once the screw is in place, take the white nylon nut to the end of the screw and tighten until the copper connectors are closed.

There is a space between the threads of the screw where it is smooth. The nylon nut only needs to be placed up to here.

Step 13: Replace Shroud
Replace the rectangular shroud that was removed in step 4.
Remember that the sealing pins on the air tubes need to be facing up for you to adequately replace the shroud.

Step 14: Replace Cover
Replace the aerator cover and corner bolts

Step 15: Replace Air Filter
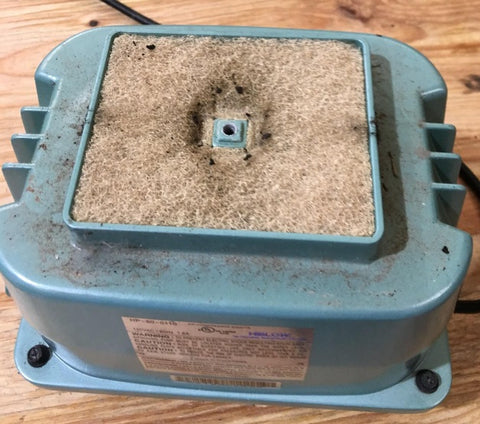
Use the Phillips head screwdriver to remove the top of the cover


Replace the old filter with the replacement from the kit

Screw the top of the aerator back on
You’re now finished
You have successfully rebuilt your Hiblow Aerator.


looks straight forward. I may try it my air pump is 2 years old seems to work fine.